Saturday, June 29, 2013

Trailer tailgate extended

Due to the leaf springs, new axle and 15" tires being installed to my trailer, the ramp was no longer at a good angle to load my scooter. I paid a welding shop $155 to extend it. Now it's a roughly 8ft tall trailer at the tailgate when raised since it's about a 6ft long tailgate and the trailer's bed is about 23" off of the ground. It's actually a few inches taller than the van (including roof ac) now and it's a very heavy tailgate but I can manage it okay. It looks a bit funny but I don't care. I can load and unload the scooter again myself.

Monday, June 17, 2013

Closet divider

I decided to add a divider into the tiny closet to make better use of the space. Now it's half for hanging clothes, half for food and other items. I can stack up the food items without them falling all over the place into the rest of the closet when driving.

The board I used for the divider was the old built in sofa drawer's bottom surface. That's why it matches on one side. I put the smooth side toward clothes so the rough side wouldn't rick catching on my clothes when putting them in and taking them out.

I am tempted to further modify the left side and build in a couple of shelves so I can sort and organize the food better. It wouldn't cost much or be much more work. Perhaps also remove the old clothes bar that wastes space.

Update here: http://cubey7800.blogspot.com/2013/07/closet-shelves.html

Tailpipe fix

Due to extending the sewer drains further out and having the tailpipe slightly at an angle, it ended up melting the new grey water cap and bayonet fitting I just installed. A muffler shop installed a new tip that extends it out a bit past the drain pipes. Cost? $30! Heck I figured the tip was going to cost that much!

Once that was done, I went back and replaced the drain outlet and cap with new ones. After about 150 miles of driving since the new drain was put on, no melting. :)

Compact refrigetator insall

Sadly, the old Dometic 211 RV fridge is not working properly. It would drop to 42 at night but jump to 50 during the day, promising spoiled food if I used it.

I priced compact refrigerators (aka: dorm fridges) and found one for $90 from Lowes. With tax and a 2 year extended warranty, it cost me just under $110. I drilled 2 small holes in the rear frame on either side and drove in screws to hold it down to the wood decking. A bungee cord over the front will hold the door shut which is how I was going to have to do the Dometic fridge anyhow.

I am hoping to be able to run it on my solar panels and batteries with an inverter. Failing that, I may just use it only when on the grid.

I retrofitted the vents outside with old scrap sheet metal I had laying around on the INSIDES of the vents, so it's almost impossible to see that it's been blocked off. Should I ever decide to sink $600-$700 into another RV fridge, I can easily remove the sheet metal and put it back to venting the space behind the fridge.

Saturday, June 8, 2013

PEX installation

I decided to sink the money into replacing the PolyB plumbing with PEX since one short section was missing and had a crappy rubber hose put on instead. The only glitches in the installation were accidentally cutting a wire harness for the rear lights (thank goodness for color coded wire insulation!) and having to use one plastic fitting at the water heater.

After I did all that, I found the galley faucet to be damaged and leaking so I also replaced that. I need a new water pump since this one won't cycle off like it should when there's no demand for water but I can install that in 10 minutes at any time later.

I left out some winterizing drains it once had but I did put one in for the water heater which was most important. The fresh water tank has it's own separate drain from the fresh water lines.


Solar panels - Part 1

I have got my new two 100W Renogy solar panels installed to the roof. I am waiting on some MC4 wire connectors for making some custom cabling between the panels and controller. I have the wiring run part way, but no photos of that yet. Once the MC4 connectors come in, I can wire them up and I'll be all set. I am putting in-line fuses on both panels and between the charge controller and batteries so it'll all be well protected and I will be able to pull fuses to disconnect power if I need to work on the system in any way.

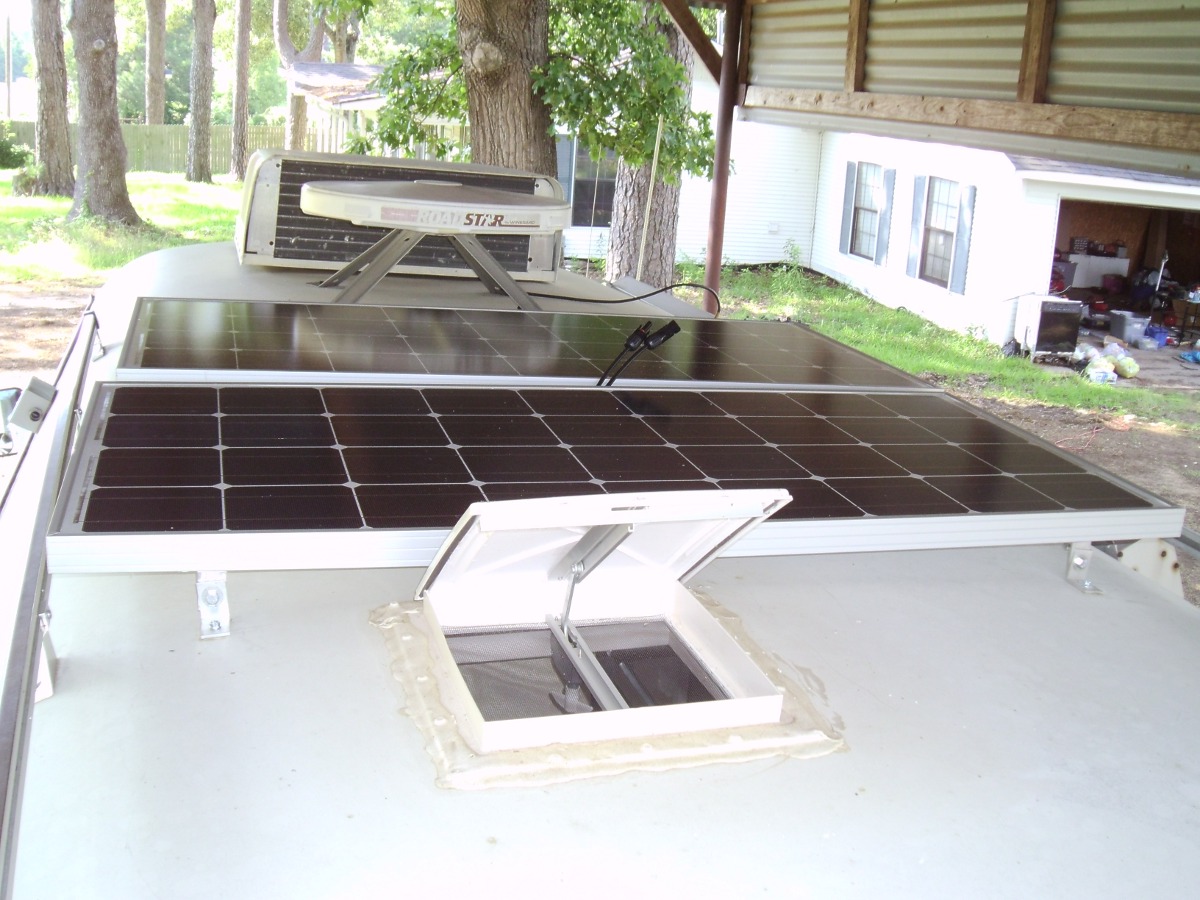
I had to offset them slightly so they aren't uniform. I realized that the rear one (installed second) was going to slightly interfere with the roof vent so I had to move it over a bit. It's not that noticeable and won't effect the usage of the panels. I'm not that OCD that they had to be perfectly lined up.

I used 3M 9468 VHB between the brackets and roof for a bit of adhesion of the brackets to the roof then put in a single sheet metal screw into a predrilled hole in the roof. They appear to be mounted plenty sturdy. I am tempted to add a tether to the sides at the decorative luggage rack for extra safety should one of the brackets break loose from the roof somehow. But since they are mounted low and should be pretty aerodynamic, I don't think there will be a problem. I have to seal around the brackets with some self leveling RV caulking next week after I get some.

I have room for expansion, for at least one 50W panel. If I were to remove the TV antenna, I could add another 100W as well but I think 200W to start with is plenty.